
Introduction
Building an app just for one language? Think again! Localization allows you to tap into a vast international audience, making your app accessible and culturally relevant to diverse users. This blog will guide you through the process of localization in iOS using Swift, helping you unlock the potential of your app on a global stage.
What is Localization?
Localization is the process of adapting an app to a specific language, culture, or region. It’s a key part of the internationalization process, which ensures that your app is ready for the global market. Localization is not just about translating text. It’s about adapting your app to the cultural norms of a target market. This includes everything from the language and date format to the images and colors you use.
Why is Localization Important?
-
Global User Reach: By offering your app in multiple languages, you broaden your user base, making your application accessible to people around the world.
-
Enhanced User Experience: Users prefer applications that speak their language, creating a more personalized and comfortable experience.
-
Cultural Sensitivity: Localization allows you to tailor content and graphics to different cultural norms, avoiding misunderstandings and ensuring your app is well-received globally.
Prerequisites
- Xcode 15.0: Ensure that you have Xcode 12.4 or later installed on your machine.
Adding Localization to Your App
Step 1: Adding a New Language
To add a new language to your app, you need to create a new strings file for that language. To do this, follow these steps:
- In the Project navigator, select the project and choose Info > Localizations.
- Select the
+button: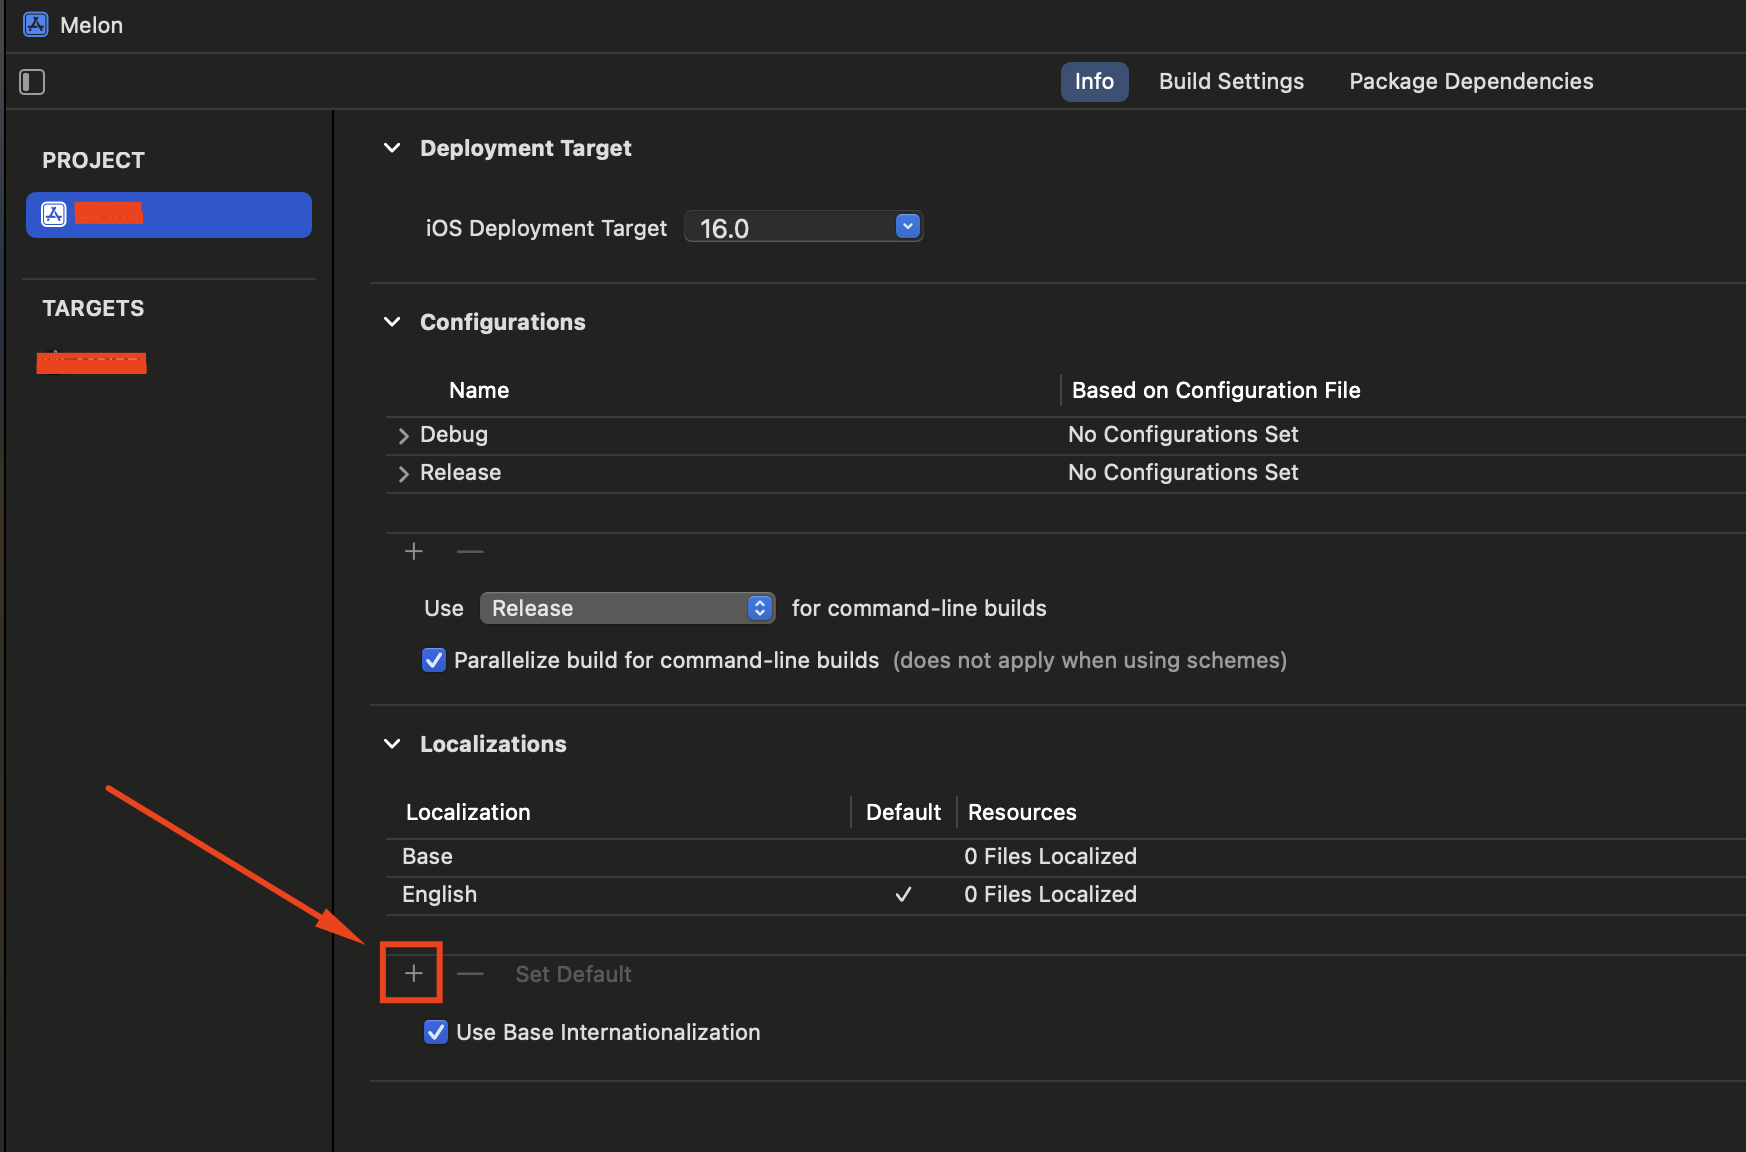
- Select the language you want to add and click Finish:
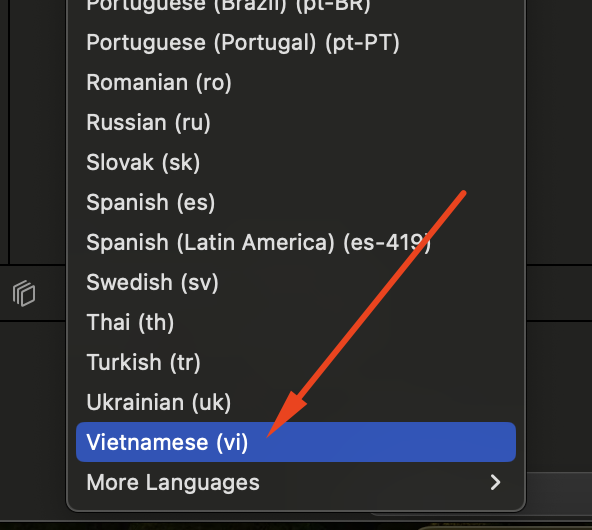
- This adds a Vietnamese file under Localizable.strings.

Step 2: SwiftUI Localization
SwiftUI Localization First, let’s add some translations.
Add this line to the English Localizable.strings file:
|
|
And this one to the Vietnamese Localizable.strings file:
|
|
Update ContentView.swift to use the new key.
|
|
- Now, run the app and you should see the English version of the text:

Testing Localization During Development
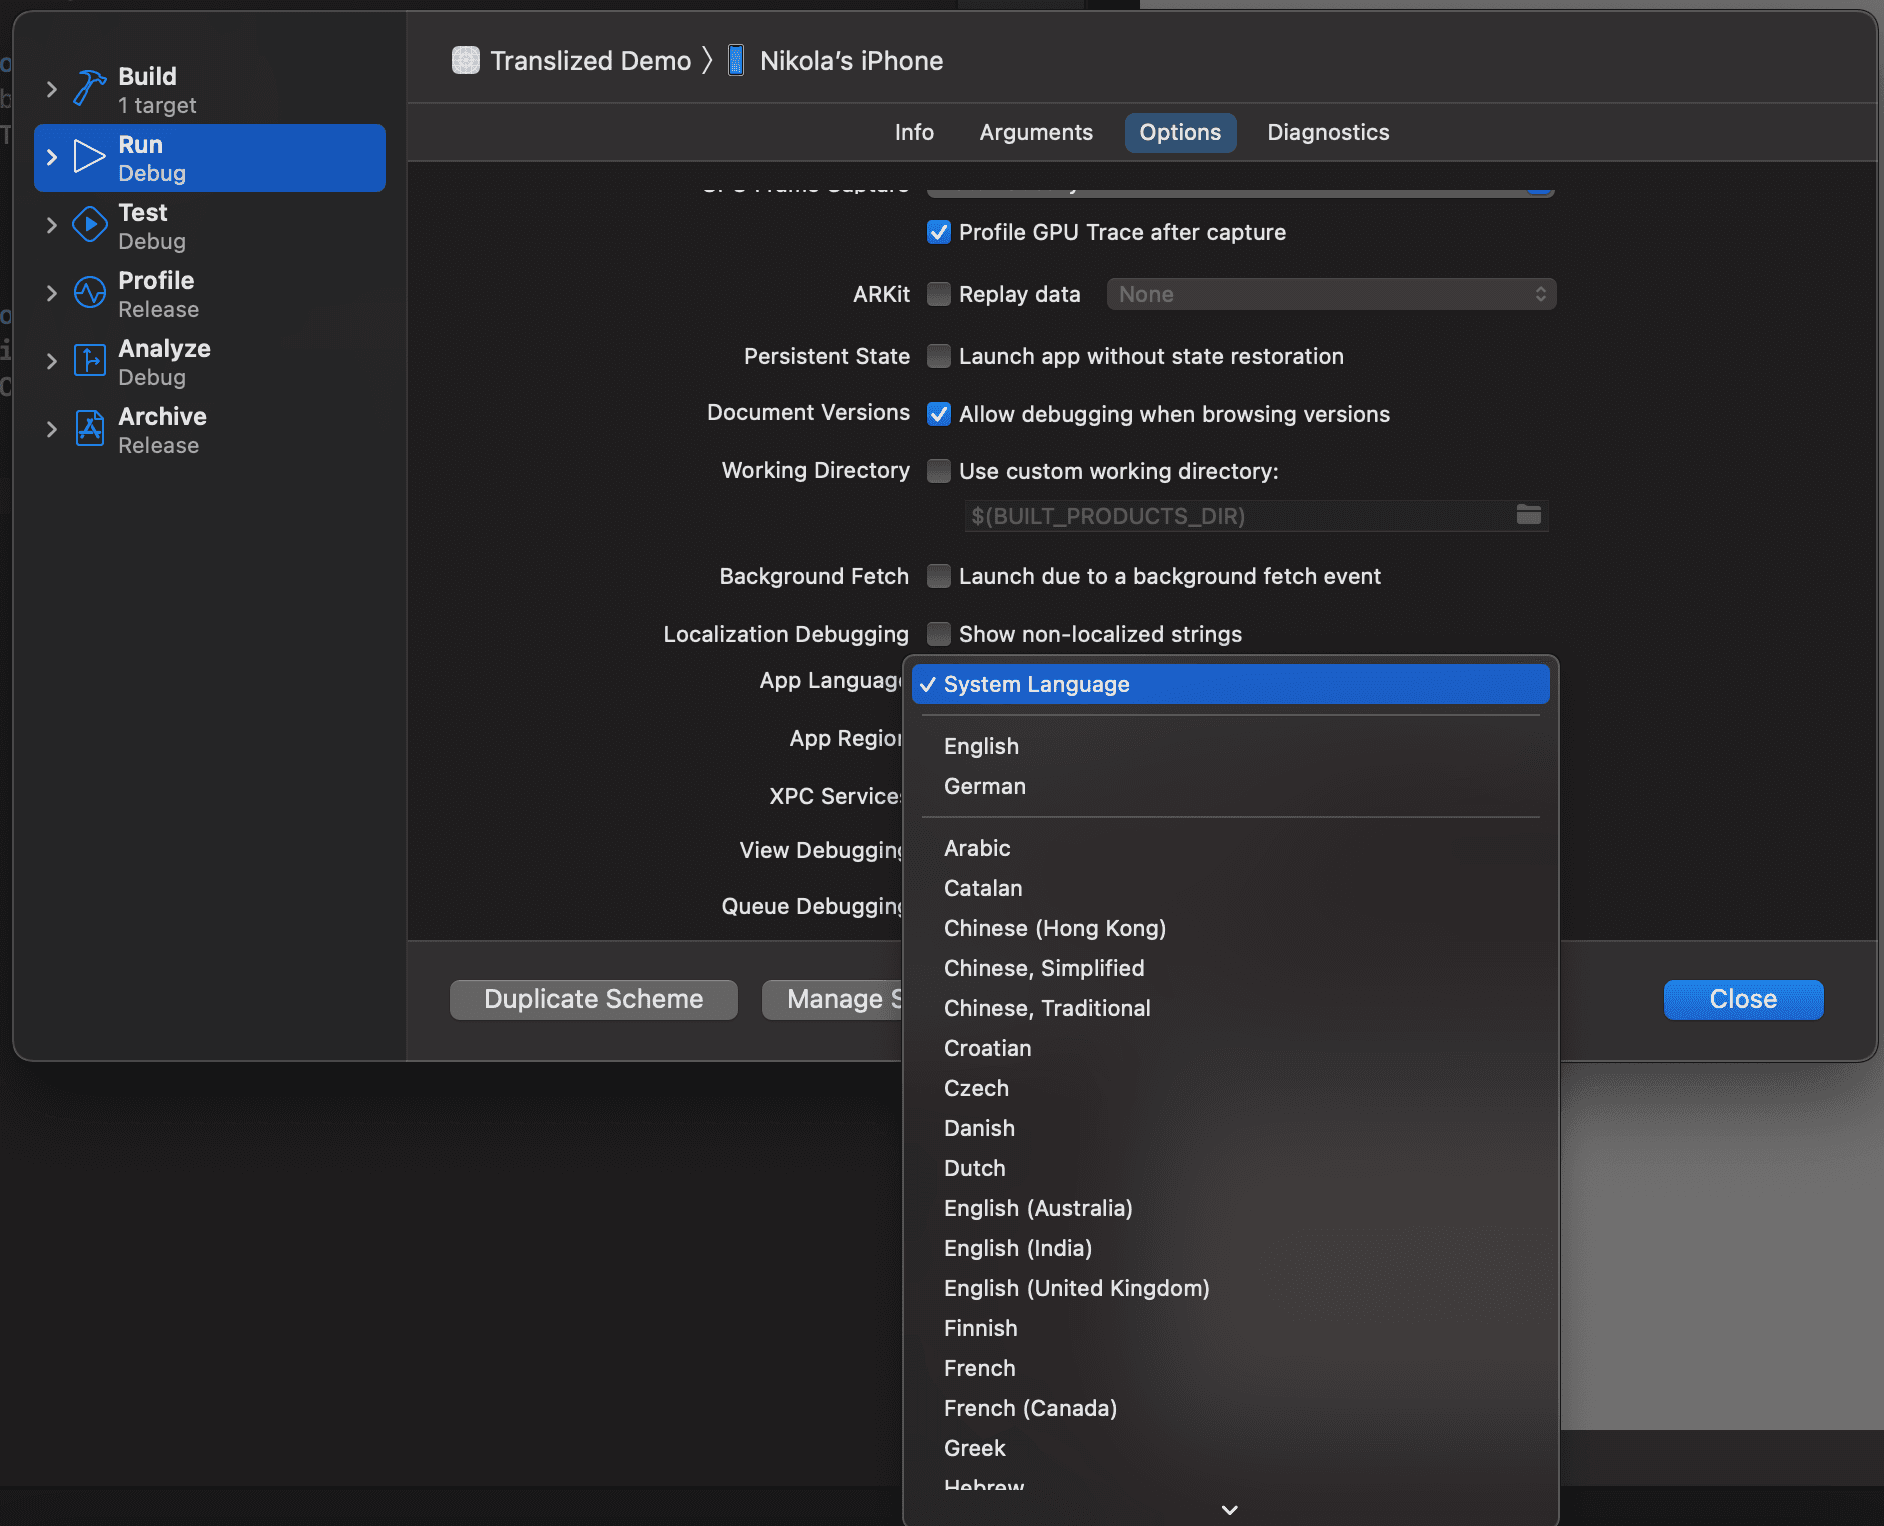
You can test specific languages you have localizations for and regions by selecting options in the scheme editor before launching your app.
Open Product ▸ Scheme ▸ Edit Scheme… ▸ Run ▸ Options. For the setting App Language , select Vietnamese from the drop-down.
Build and run your app. You should see the Vietnamese version of the text